Setting Up a Moodle Classroom
Posted by PLB Registrar · Leave a Comment
 When you first “enter” your new online Moodle classroom, it may seem a bit daunting. Lots of empty space, maybe some course blocks in the sidebars, and in the top section of your classroom will be a resource titled “News Forum”. Before you try to do anything, make sure you turn your editing on.
For this post we’ll operate in your classroom presuming that it’s set up in the Topic format, which means that you have several “sections” laid out in the middle of the page, the first one unnumbered, and then the rest having a number in the top left corner. Each of these sections (topics) has an “add a resource” drop-down menu and an “add an activity” drop-down menu. You can set up your classroom with enough weeks for your course. For example, if you have a quarter-long course, you would set your course up with 9 topics or weeks.
Follow these instructions to set up your classroom:
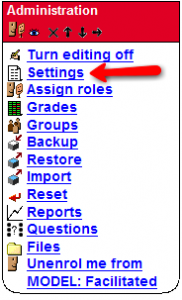
1) In the Administration block on your sidebar, click on Settings, as shown here
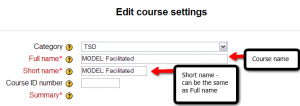
2) Input the name for your course
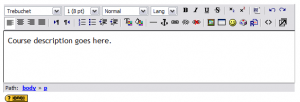
3) Input your course description
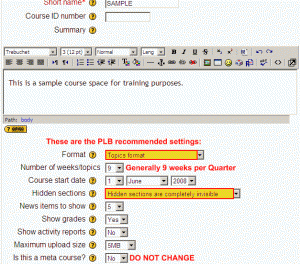
4) Change the number of topics (weeks)
As shown below, scroll down past the course title and description and make sure the course is set at Topics format and then click on the drop-down menu to increase (or decrease) the number of weeks (topics) for your course. You can change this at any time during your work in your course through the WYSIWYG editor.
The remaining settings should be left untouched. If you are unsure about this, please check with your learning facilitator or Moodle administrator.
5) Click on “Save Changes” at the very bottom of the page.
Your course is now set up for you to begin work! Remember, you can change these settings at any time if needed.
